
How to Configure Custom Loadouts for Players on Your DayZ Server Print

  • Custom Player Loadouts, Player Loadouts, Server Configurations, dayz standalone, DayZ
  • 0

DayZ Logo

This guide will help you configure custom loadouts for Players on your DayZ Server


Configuring custom player loadouts on your DayZ server lets you control exactly how players enter the world, from starter gear and survival essentials to faction‑specific kits and progression‑based equipment. By defining custom loadouts, you can streamline early‑game balance, support role‑play scenarios, and ensure new players spawn with the tools your community expects. This introduction sets the stage for a clear, structured walkthrough of how to create, customize, and manage loadout configurations so you can shape a consistent, intentional experience every time someone joins your server.


Configuring Custom Player Loadouts on Your DayZ Server


Before you begin configuring custom loadouts, make sure you have the correct item classnames. You can find a complete, up‑to‑date list here: https://github.com/ravmustang/DayZ_SA_ClassName_Dump


1. Log in to your Game Control Panel, then head over to your server service.

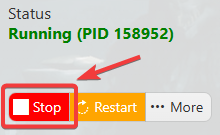
2. Before making any changes, stop the server by clicking the Stop button.
 

3. Log in to your FTP client. For best results, edit your configuration files locally with a proper code editor to avoid syntax issues, though you can also use the file manager in your game panel if needed.

4. Navigate to the following directory: /mpmissions/dayzOffline.chernarusplus.

5. If you're working through FTP, open the init.c file with a proper code editor like Notepad++ to ensure correct syntax highlighting and formatting. If you prefer, you can also edit the file directly through your game panel’s file manager.


Look for the following area:


override void StartingEquipSetup(PlayerBase player, bool clothesChosen)
{
/*
player.RemoveAllItems();
 
EntityAI item = player.GetInventory().CreateInInventory(topsMissionArray.GetRandomElement());
EntityAI item2 = player.GetInventory().CreateInInventory(pantsArray.GetRandomElement());
EntityAI item3 = player.GetInventory().CreateInInventory(shoesArray.GetRandomElement());
*/
EntityAI itemTop;
EntityAI itemEnt;
ItemBase itemBs;
float rand;
 
itemTop = player.FindAttachmentBySlotName("Body");
 
if ( itemTop )
{
itemEnt = itemTop.GetInventory().CreateInInventory("Rag");
if ( Class.CastTo(itemBs, itemEnt ) )
itemBs.SetQuantity(4);
 
SetRandomHealth(itemEnt);
 
itemEnt = player.GetInventory().CreateInInventory("MP5K");
itemBs = ItemBase.Cast(itemEnt);
 
itemEnt = itemTop.GetInventory().CreateInInventory("RoadFlare");
SetRandomHealth(itemEnt);
 
itemEnt = itemTop.GetInventory().CreateInInventory("CombatKnife");
SetRandomHealth(itemEnt);
 
itemEnt = player.GetInventory().CreateInInventory("AssaultBag_Green");
itemBs = ItemBase.Cast(itemEnt);
}
 
rand = Math.RandomFloatInclusive(0.0, 1.0);
if ( rand < 0.25 )
itemEnt = player.GetInventory().CreateInInventory("SodaCan_Cola");
else if ( rand > 0.75 )
itemEnt = player.GetInventory().CreateInInventory("SodaCan_Spite");
else
itemEnt = player.GetInventory().CreateInInventory("SodaCan_Pipsi");
 
SetRandomHealth(itemEnt);
 
rand = Math.RandomFloatInclusive(0.0, 1.0);
if ( rand < 0.35 )
itemEnt = player.GetInventory().CreateInInventory("Apple");
else if ( rand > 0.65 )
itemEnt = player.GetInventory().CreateInInventory("Pear");
else
itemEnt = player.GetInventory().CreateInInventory("Plum");
 
SetRandomHealth(itemEnt);
}


6. Next, gather the updated classnames from the link provided at the top of this guide. Replace the existing entries with the new items you want players to spawn with, or duplicate one of the existing lines and insert the classname of any additional item you want to include in the loadout.
 
Keep in mind that a player’s inventory has limited capacity, so only add items that reasonably fit within the available slots to avoid spawn issues or missing gear.
 
 
itemEnt = itemTop.GetInventory().CreateInInventory("Battery9V"); SetRandomHealth(itemEnt);


7. After finishing your changes, save the file and re‑upload it to your server via your FTP client to apply the updated loadout configuration.

8. Start your DayZ Standalone server, then wait for it to fully initialize before joining. Full startup can take up to 10 minutes, so be sure the server is completely ready before connecting.


Keep in mind that these custom loadouts only apply when starting a fresh character. Existing characters will not receive the updated items unless their data is wiped or they respawn as new.


 If you encounter any issues, please click here to contact our support team via a ticket for further assistance.


Was this answer helpful?

« Back