
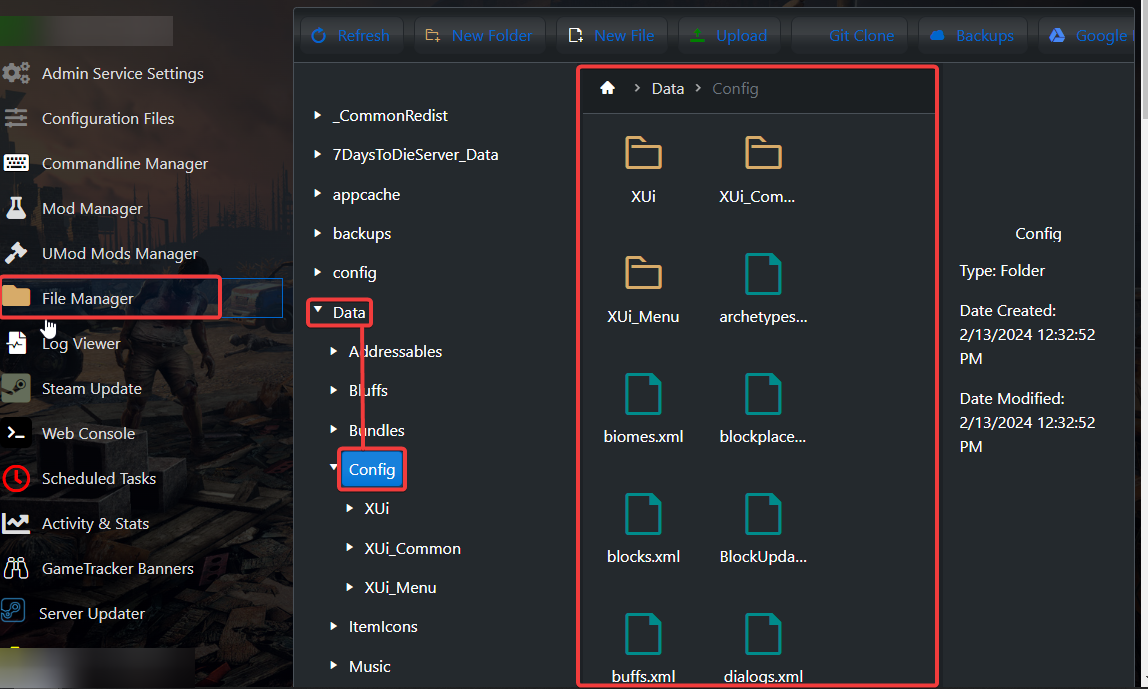
First, go to your Game Control Panel.
Find File Manager, click it, and then select Data\Config.
A number of .xml files in this configuration folder need to be edited in order to add XML mods.
The items.xml file will be used in this example, but all files should follow this general guideline.
1. Copy the given mod code.
<item id="1972" name="lokiStew">
<property name="Extends" value="meatStew" />
<property name="CustomIcon" value="meatStew" />
<property class="Action1">
<property name="Gain_food" value="40" />
</property>
</item>
2. Open the relevant xml that corresponds to the code. In this case, it is the items.xml file.
3. Move to the bottom of the file and insert the copied code ABOVE the line that reads "</items>."
The line </items> should always be at the bottom of the file. Not to be confused with </item>.
4. Make sure that no other item is using the item ID that the copied code is using, unless the moderator expressly requests that you replace vanilla.
It must have a unique ID number assigned to it.
Almost all of these guidelines apply to whatever additional mod code you add.
If you encounter any issues please click here to reach out to our support team via a ticket for further assistance.
