

This guide will help you with the Killing Floor 2 Server Setup & Configuration Guide
Take Your Killing Floor 2 Experience to the Next Level with Ascend Servers
The Killing Floor 2 Server Setup & Configuration Guide provides a practical reference for setting up, configuring, and managing a dedicated Killing Floor 2 game server. This guide is designed for server administrators and hosting customers who want to create and maintain their own Killing Floor 2 server. It covers the essential steps required to get a server online, configure gameplay and server settings, manage maps and game modes, and customize the server to suit your community. Whether you are setting up a server for friends, running a public community server, or managing a larger gaming environment, this guide aims to make the process straightforward to follow. The guide also provides configuration examples and administrative commands that can help with routine server management and troubleshooting. Before making changes to a live server, it is recommended to create a backup of your configuration files and verify that any changes are compatible with your current server setup. By following the procedures in this guide, you can establish a stable and customized Killing Floor 2 server that delivers a reliable experience for your players.
Setting Up Your Killing Floor 2 Server
1. Log in to your Game Control Panel, then head over to your server service.
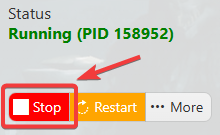
2. Before making any changes, stop the server by clicking the Stop button.
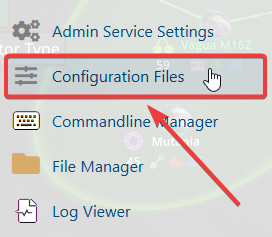
3. Navigate to the Configuration Files Task section.
4. Under Configuration Files, locate PCServer-KFGame.ini and click the Text Editor button on the right to open the configuration file for editing.
This file contains the primary settings used to configure various gameplay and server-related options in Killing Floor 2. Administrators can customize a wide range of features, including game modes, spectating options, gameplay behavior, and other server settings to suit their preferences. As a first step, administrators should review and update the essential settings in this file, including WebAdmin credentials, the server password, and other key configuration options. Reviewing these settings before starting the server helps ensure that the server is configured correctly and provides the desired experience for players.
Server_Passwords
[Engine.AccessControl] in PCServer-KFGame.ini:
| Option Name | Valid Entries | What this option controls |
|---|---|---|
| AdminPassword | Alphanumeric character combinations. Example: Sh3eAl5y | This is the master server administrator password used to authenticate administrative access to the server. |
| GamePassword | Alphanumeric character combinations. Example: Gj5kY8LG | This setting specifies the server password that players must enter to join the server. |
Server Name and Admin Contact
[Engine.GameReplicationInfo] in PCServer-KFGame.ini:
| Option Name | Valid Entries | What this option controls |
|---|---|---|
| ServerName | Alphanumeric character combinations. Example: KF2Ascend345 |
This setting specifies the server name displayed to players in-game and in the server browser. |
| AdminContact | Alphanumeric character combinations. Example: [email protected] |
This setting specifies the administrator contact information displayed in the server browser. |
Server Maps
bUseMapList=True
Enables the server to use a custom map list that you define instead of loading the default map rotation.
GameLength=1
Sets the number of rounds played per game.
0 → Short (4 rounds)
1 → Normal (7 rounds)
2 → Long (10 rounds)
Maps can be assigned based on the game type and the number of rounds you want the server to run. The example below demonstrates how to define a map list in your configuration file.
| Game Map Cycle |
|---|
| GameMapCycles=(Maps=("KF-BurningParis","KF-Bioticslab","KF-Outpost")) |
If you encounter any issues, please click here to contact our support team via a ticket for further assistance.